Common Mistakes to Avoid During Siding Installation
- Copywriter
- Apr 14
- 8 min read
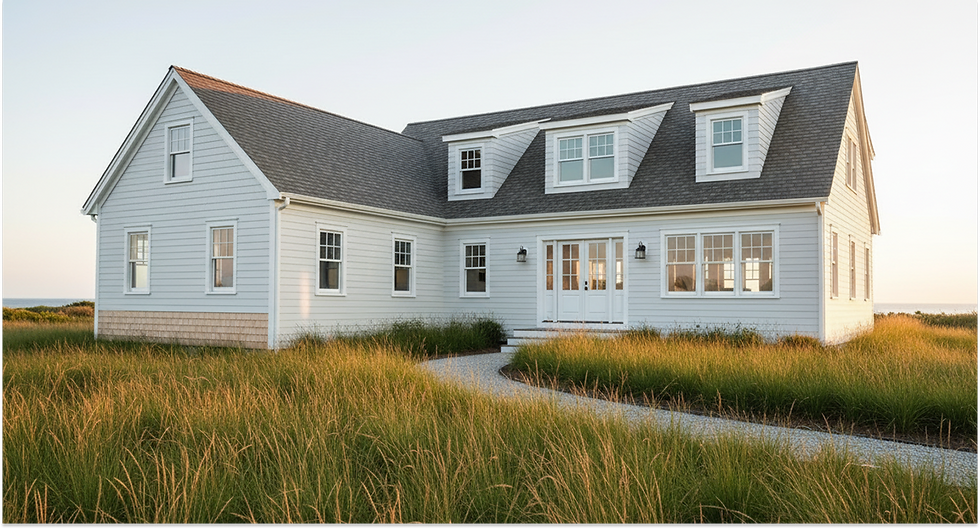
Siding work looks deceptively straightforward. From a distance, panels go up, courses align, and a house gets a fresh face. What that view misses is everything happening behind the surface: how panels breathe under thermal stress, how water moves through gaps that should never exist, and how a single overlooked detail at the base of a wall can quietly admit moisture through an entire season of nor'easters and freeze-thaw cycles. On Martha's Vineyard and Cape Cod, where salt air, sustained coastal winds, and the particular brutality of a New England winter put exterior systems under sustained pressure, those details are not optional. They determine whether a siding installation holds for twenty years or fails in five.
What makes coastal siding installation distinctly demanding is not any single challenge but the combination. Salt spray degrades adhesives and accelerates corrosion in fasteners. Wind-driven rain arrives at angles and pressures that standard residential testing does not simulate. Temperatures swing from well below freezing in February to humid heat in August, cycling materials through expansion and contraction ranges that expose every installation shortcut. And because many properties on the Vineyard and Cape are second homes or seasonal investments, defects can accumulate undetected for months before anyone sets foot on the property again.

Understanding Vinyl Siding Installation
Vinyl siding has become the dominant cladding choice for many coastal properties, and the reasons are legitimate. It resists rot, requires no painting, holds up against insects, and in its better grades offers meaningful impact resistance. But none of those advantages arrive automatically. They depend entirely on the installation being executed correctly. Poorly installed vinyl siding can trap moisture against the sheathing, pull away from the wall under wind load, and create pathways for water intrusion that defeat the purpose of the product entirely.
A common misconception is that vinyl siding is a waterproof system. It is not. It is a weather screen, designed to shed the bulk of precipitation while allowing the wall assembly behind it to manage any moisture that does infiltrate. The drainage plane, the housewrap, the flashing details at openings, and the ventilation characteristics of the assembly behind the siding all contribute to long-term performance. When any of those components is compromised by an installation error, the vinyl panel on the outside is the last thing that will show it. The rot, the mold, and the structural deterioration develop in the layers that are invisible until something has gone seriously wrong.
There is also the matter of timing. Vinyl siding installation has temperature constraints that are rarely communicated clearly to property owners. Below about 40 degrees Fahrenheit, vinyl becomes more brittle and more susceptible to cracking during cutting and handling. Panels installed in cold weather are also at or near their minimum contracted length, which means that if clearance gaps are set for cold conditions they may be correct now but insufficient when summer temperatures push the panels toward their maximum expanded length. On the Vineyard and Cape, where early spring and late fall often present the scheduling windows property owners prefer, these temperature dynamics are a regular practical concern rather than an edge case.
Types of Vinyl Siding
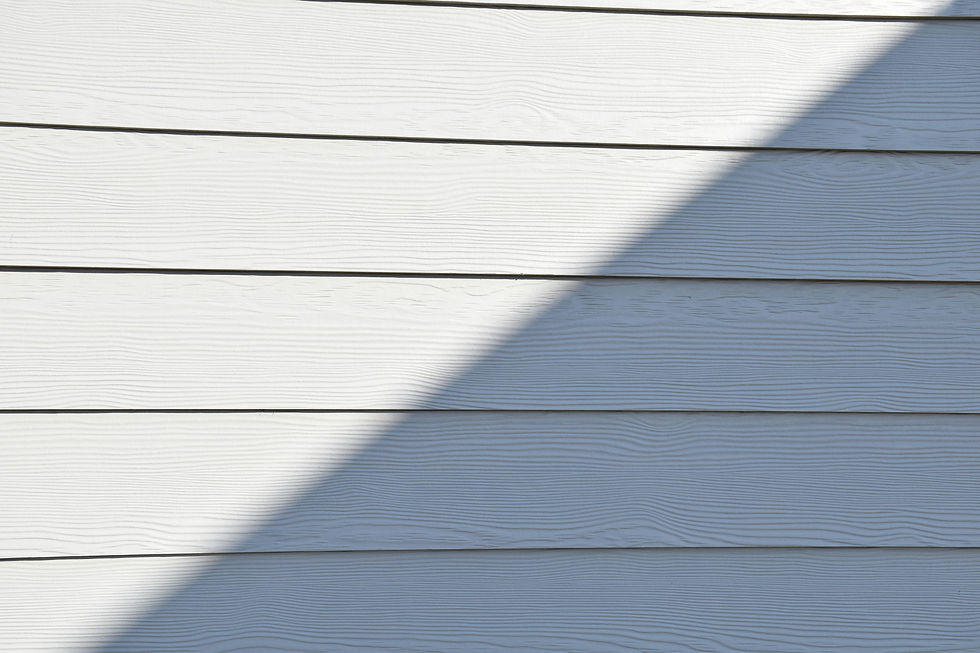
Horizontal lap siding is the most common configuration on Cape Cod and Martha's Vineyard, fitting naturally within the region's architectural traditions and performing well when correctly installed. Beyond the standard lap profile, homeowners also encounter Dutch lap, beaded seam, and vertical board-and-batten options, each with different installation requirements at corners, J-channels, and panel transitions. Shake and shingle panels appear frequently on gable ends and accent walls, and they add their own complexity at the eaves.
The mistake many projects make is treating all of these profiles as interchangeable during installation planning. Each has specific overlap requirements and different accessory configurations at inside and outside corners. Confusing them leads to misaligned courses, gaps at trim transitions, and panels that flex or pop under wind pressure. On a Cape Cod colonial with a full gable end in shakes and horizontal lap on the main body, the transition between those two systems needs to be planned and detailed before the first panel goes up, not improvised when the installer gets there.
Benefits of Vinyl Siding
Higher-grade vinyl products also offer improved fade resistance and thicker wall sections that hold their shape better under the kind of UV and thermal loading that coastal south-facing exposures deliver. Investing in a better product makes sense only when the installation preserves those qualities. A premium panel installed incorrectly will underperform a standard panel installed right.
Key Mistakes in Preparation for Siding Installation
The errors that end up costing the most money rarely happen when panels are going up. They happen before the first course is ever set. Preparation work determines the performance ceiling for everything that follows, and on coastal homes with complex geometry, dormers, and additions built across different eras, that preparation phase deserves real time and attention.
Ignoring the House Wrap
On Martha's Vineyard especially, where second homes may sit unoccupied for months at a time and go uninspected through a winter of storms, a compromised housewrap can allow moisture to accumulate behind siding without anyone noticing until rot has spread through the sheathing. At that point, the repair bill looks nothing like a siding project anymore. The flashing at window sills and door heads is part of this same system, and it demands the same care. Every penetration, every transition, and every termination of the housewrap is an opportunity for water to find a path if it is not addressed correctly.
Inadequate Measuring and Layout
Layout errors compound across every course of siding. A baseline that is even slightly off-level at the first course drifts further out of alignment as it rises up the wall, and on a two-story home with forty or fifty courses, that drift becomes visible from the street. Proper layout requires snapping chalk lines at each major interval, checking the wall for plumb before starting, and accounting for irregularities in the foundation or framing before the first panel is set. Walls that look plumb rarely are, and the starter strip needs to accommodate that reality rather than ignore it.
The other measuring mistake involves not accounting for window and door locations during course planning. When horizontal siding courses do not align cleanly with the tops and bottoms of window frames, the trim work at those openings requires awkward cuts and reveals that undermine the finished appearance. Good installers plan their layout around the fenestration, not the other way around. On a historic home on the Vineyard with original double-hung windows at irregular heights, this planning step takes time. Skipping it produces results that will look wrong for the life of the siding.
Choosing the Wrong Tools
Siding installation does not require exotic tools, but it does require the right ones, and using the wrong ones introduces errors that are difficult to undo. A zip tool for unlocking panels, tin snips or a siding brake for clean angled cuts, a snap lock punch for creating the locking tabs on cut edges, and a pneumatic nailer calibrated for siding work are the essentials. Over-driven nails prevent the necessary expansion gap at nail slots and cause the buckling that homeowners often mistake for a product defect. Under-driven nails leave panels loose, which creates noise under wind load, allows movement at joints, and eventually opens gaps at seams.
Cutting tools matter too. Circular saws are efficient but produce heat at the cut edge that can cause crazing in some vinyl formulations. Scoring and snapping, or cutting with the saw blade reversed, produces cleaner edges that fit better in channels and trim accessories. On coastal homes where the finished appearance is a significant component of the property's value, these details are not minor.
Missteps in Vinyl Siding Installation Techniques
Even with careful preparation, installation errors can undermine the entire project. These are the mistakes that tend to be invisible at completion but reveal themselves within the first year of exposure, often after the first winter delivers a sustained test.
Improper Nailing Techniques
Fastener choice is the other side of this equation. Aluminum nails are standard and appropriate for coastal environments. Steel nails corrode in salt air and will stain panels with rust streaks over time, an issue especially relevant on Martha's Vineyard where properties face direct marine exposure year-round. Nailing frequency matters as well. Skipping nail slots to save time leaves sections of panel with insufficient attachment, and those sections are the ones that lift under wind uplift or walk away from the wall over time.
Incorrect Overlapping
Horizontal lap siding sheds water through gravity and proper overlap at each course. The minimum overlap specified by most manufacturers is one inch, but panels installed in high-wind regions typically require more. On Cape Cod and Martha's Vineyard, wind-driven rain does not arrive vertically; it pushes against wall surfaces with enough pressure to travel upward along the back of a panel if the overlap is insufficient. Shortchanging the overlap by even a quarter inch, repeated across dozens of courses, creates a wall that performs like a rain screen rather than a siding system.
End laps at splices within a course require attention as well. Joints should be staggered from course to course to prevent a continuous vertical seam that channels water directly down the wall face. The overlap at these splices also needs a minimum clearance to the accessory channels on either end, to allow for expansion without panels binding or buckling when temperatures rise. Staggering joints and keeping them out of high-visibility sightlines is standard professional practice that inexperienced crews frequently overlook.
Overlooking Maintenance and Care After Siding Installation
Correct siding installation is the beginning of the conversation about exterior performance, not the end of it. A properly installed system still requires periodic attention to remain effective, and on the coast, the attention cycle is compressed compared to inland properties. Salt air, organic growth, and the cumulative effects of weather exposure work on exterior systems continuously.
Failing to Inspect After Installation
Pay particular attention to corners, trim transitions, and every location where a penetration breaks the plane of the siding: vents, hose bibs, outdoor electrical outlets, and light fixtures. These are the locations where caulk is the only barrier between the exterior and the wall assembly, and caulk degrades. It degrades faster in UV-heavy coastal environments than manufacturers' ratings often suggest, and it degrades even faster if it was applied in cold temperatures or over a dusty or damp surface during installation. Catching caulk failures in their first season costs nothing compared to finding them after they have been admitting water for two winters.
Conclusion
Vinyl siding installation done correctly is a durable, low-maintenance solution well-suited to coastal homes. But the standards that define correctly are precise, and the consequences of falling short on Martha's Vineyard and Cape Cod arrive faster than they would elsewhere. Salt air accelerates corrosion. Sustained wind loads test fastener placement and panel overlap. The freeze-thaw pressure of a New England winter finds and enlarges every gap, every inadequate caulk joint, and every panel locked too tight to move.
None of the mistakes outlined here are obscure or unavoidable. Skipped or damaged housewrap, off-level layout, incorrect nailing, insufficient overlap, and neglected follow-up inspection are all preventable. They require knowledge of the material, respect for manufacturer specifications, and an understanding of the coastal context that shapes every installation decision. They also require time, which is consistently the resource that separates a thorough installation from a fast one.
Choosing the right team makes all the difference. Millers Pro Roofing & Siding approaches every siding installation as a complete exterior system, ensuring proper moisture control, structural integrity, and a refined finish that performs as beautifully as it looks. For homeowners who value durability, craftsmanship, and long-term peace of mind, working with specialists who understand coastal construction is what turns a simple installation into a lasting investment.
Recap of Key Mistakes to Avoid:
Installing or tearing housewrap incorrectly, and failing to detail it at all windows, doors, and penetrations
Setting a starter course without confirming level, allowing drift to compound up the wall
Nailing through nail slots with fasteners driven flush, locking panels and preventing thermal movement
Using steel fasteners in salt-air environments where corrosion and staining are predictable outcomes
Providing insufficient overlap at panel joints and at corner, J-channel, and trim accessories
Skipping the post-installation inspection after the first winter season
Neglecting annual cleaning and close-range inspection that catch early failures before they become structural


Very good article!